Showing posts with label lace. Show all posts

Friday, April 15, 2016

Finished bridesmaid dresses


The wedding was about a month ago and I've finally recovered enough to talk about it! This is going to be a photo heavy post - there were too many nice photos of the day just to pick a couple.

This is the final post about bridesmaid dress sewing - part 1, part 2, part 3.


My boy has grown so much lately, I'm still taller than him in heels though!
 
BTW, its apple juice!
(Photo credits to: John Davies Photography)

Pattern Details;

Simplicity 4070 for the bodice
Simple gathered skirt

C was 38 weeks pregnant at the wedding, I did the final fitting the weekend before with her and took a couple of tucks out of the lace to get the bodice sitting smooth.
I had a great comment from Sarah on my first post;
"1) empire waist dress 2) yes - you need the pregnancy / beer belly equivalent of FBA to cope with the 8 month bump. Add extra length in an arc from side seam to seam, and extra width to the front skirt. I'd leave hemming and finalising the dress to the week before the wedding."

Adding the extra length in an arc worked an absolute treat and I hemmed the dress on the weekend before as well, just to allow for any extra changes.
The empire waistband sat nicely above her belly. I do think the inside bodice should have come up higher, thankfully its not too noticeable but just goes to show that even with a fully sewn muslin, the fabric affects the fit so much (I even used a lace overlay on the muslin but it must have been a stiffer lace).

I hand stitched in the lining, its a cotton from Clear-It in Melbourne. Not a perfect match for colour but the closest I could find. I am so glad I went with cotton, it was a pretty hot day (got to 30 degrees Celsius) and we would have melted in a polyester.


Fabric Details;
The lace was a op-shop find in Tailem Bend.
The main fabric is a double gorgette from Spotlight
Lining is cotton from Clear-It
Buttons are plastic ones from Lincraft.
Zipper and bias binding was from Spotlight.
My dress had plastic boning along all seams, but I left it out of C's dress.
 
I made sure to tell my family if I ever offer to sew anything wedding related again to slap me! I found it pretty stressful, normally if I sew something that I don't like or doesn't fit, it gets chucked in my corner of shame, but sewing these dresses I couldn't make any mistakes, not the least because I had such a limited amount of lace that couldn't be replaced.


I am pretty proud of what I achieved, they are not perfect and I would have loved to use a more luxurious fabric and made a few more muslins but I managed to make them both in time for roughly $100 in materials (not counting time or muslin fabrics) so you have to count that as a win!

Wednesday, March 9, 2016

Victory Pattern 1002: Hacked Ava dress


This poor pattern doesn't really resemble the original Ava dress anymore! I needed a dress with a zipper for the morning of my friends wedding and wanted a comfy knit one so that's how this dress idea was born. I wanted it different enough from my last version too which is why I changed the back and added sleeves.

Fabric: Blue spandex knit from Spotlight and a mixture of bias binding on the waistband and some black knit for the neckline and sleeve binding. The lace is a remnant from Clear It.

Adjustments;
Same as last time;
Size 14
Added 1" FBA
Changed darts into princess seams
Added the waistband.
Dropped the neckline by 1"
Sewed the side seams last and took it in by 1/2" each side.
Made the length somewhere in between the short and long length.
Added pockets from the Burda dress I last made.

Plus - morphed the back pattern pieces into one then added the lace cut-out.
Added sleeves


The sleeves were a bit of a fiddle - I forgot to add extra seam allowances onto the armscye so there is some slight pulling at the front. I do like the shape of them though - they are based a bit on the Colette macaron sleeves except I just hacked at the sleeve until I liked the shape!


There is some slight hitching at the front - having the knit as the bodice top instead of lace made it sit slightly higher and really needs 1/2" or so added to the bodice length.

I like how the bias binding highlights the interesting seamlines on this pattern and I really love the lace - I still have a reasonable amount left so expect to see it again!
 

Monday, February 8, 2016

Victory Patterns 1002: Ava Dress


I seem to be going back through my old patterns lately and sewing them up! I made this as the blouse a couple of years ago. I always wore it with a wide belt though as it had a tendency to poof out on my stomach so I got rid of it in the big wardrobe cull of 2015.
This time I wanted to correct the things that bothered me with the first version - added a waistband to eliminate the poofyness, used smaller bias binding to make the binding sit smoother, got rid of the darts and added princess seams. Otherwise its a fairly similar colour palette - purple ponte and a basic black lace!

Pattern details;

Size 14
Added 1" FBA
Changed darts into princess seams
Added the waistband.
Dropped the neckline by 1"
Left out the zipper (hooray for ponte!)
Sewed the side seams last and took it in by 1/2" each side.
Took 1.5cm out of the bodice length (once the skirt was added the weight dropped it all too low)
Made the length somewhere in between the short and long length.
Added pockets from the Burda dress I last made


Fabric;
Ponte from Clear-It
Lace from the salvos (its just a cheap Spotlight one though)

Insides are all serged and I reinforced the shoulder seams with some selvage since the dress is quite heavy


I like how unpretentious this dress is in regards to sewing the lace, no fanciness, just sew it up like any other fabric. For someone who's still a little scared of lace I like how basic it is. No couture techniques here, just serge it all up and no worries!

I'm really happy with it, its a pretty dress that I can still wear with a shrug to work. And I am so much happier with the fit now compared to my first attempt!

Daughter approved!

Thursday, October 1, 2015

Bridesmaid sewing: V.1 - adventures in couture sewing

I feel like a fraud writing couture sewing - do real couture seamstress consider using the serger instead of binding seams? Or think that silk organza is a scratchy itchy seam binding? Or use plastic boning stitched into seams?!

Anyway, I started fitting and sewing the first practise run of the bridesmaid dresses. I'm using Simplicity 4070, its the only pattern I have with a lace overlay which means I don't need to draft anything.


I'm pretty much following the instructions out of the Bridal Couture book so cut everything with big wide seam allowances and marked the stitching lines with wax tracing paper.

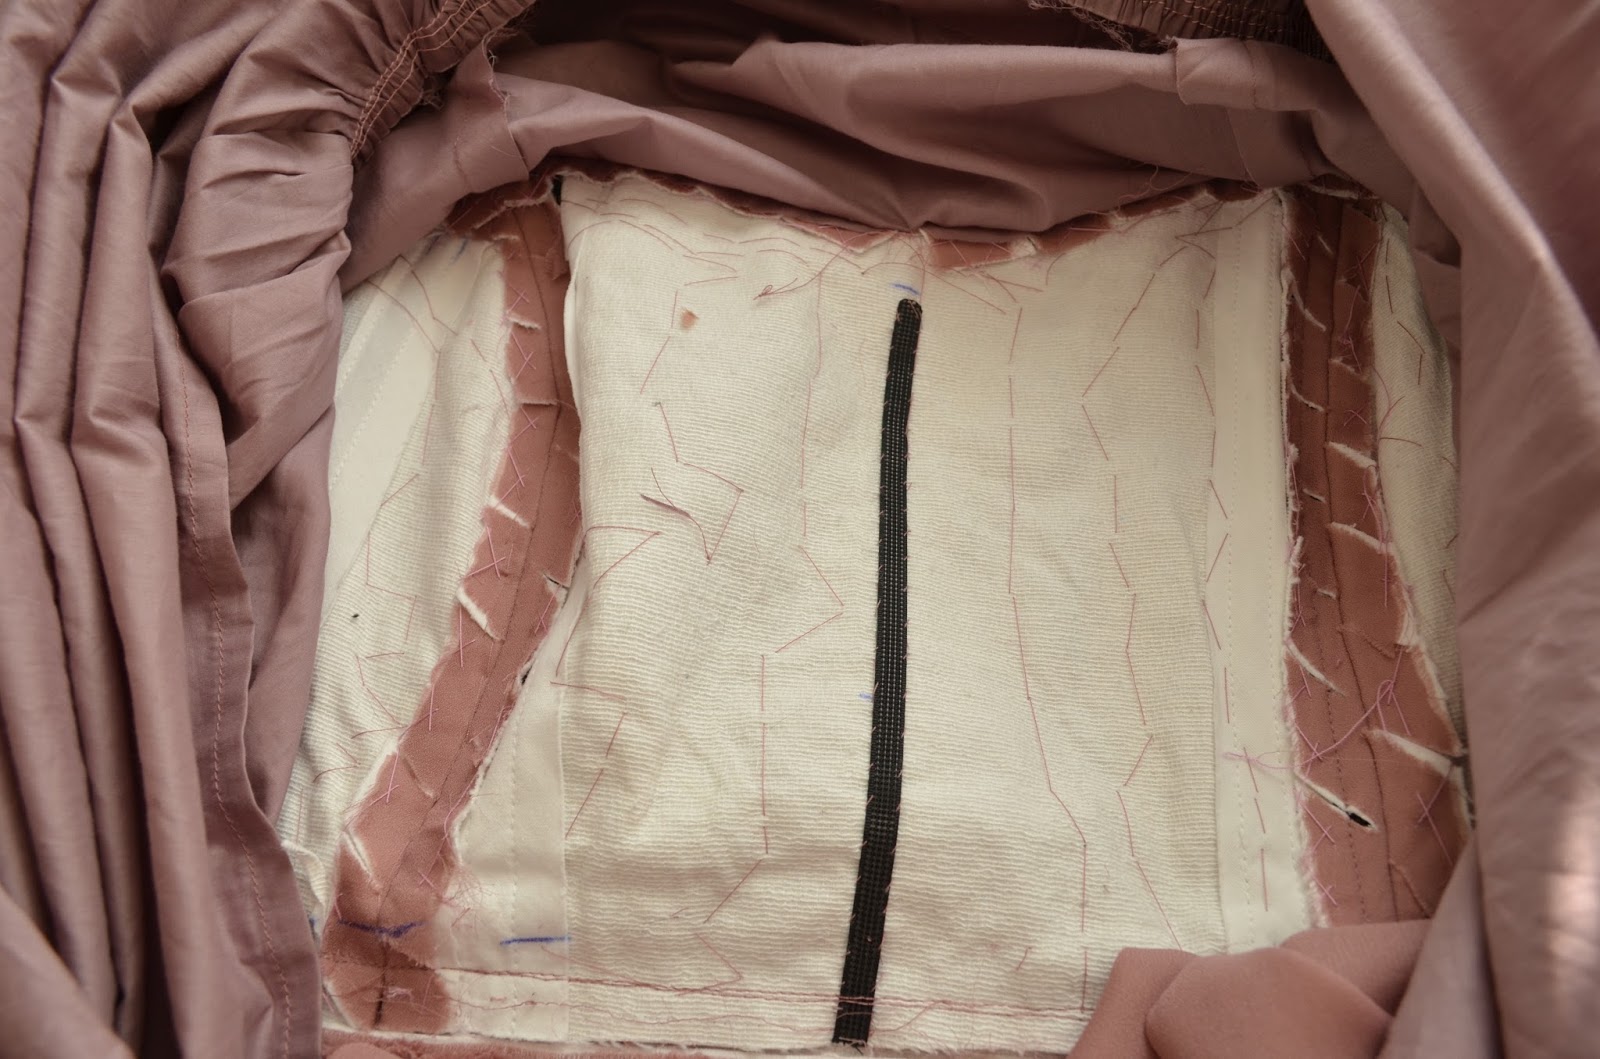
I underlined the georgette with muslin which gave it a bit of body and let me catch stitch down the seam allowances. I wanted to add in boning and had a big roll of rigeline in my shelf - I used two strips on either side of each seam except for the very front seams where I only used one. Its smoothed out the bodice nicely. I left it too late to add channels so just stitched it into the seam allowances before they were catch stitched down.


It did originally make the bust seam sit out a bit too far but I found this awesome post on pattern review and went back and unpicked the boning and eased it in and now its sitting perfectly.

I planned on using silk organza to underline the lace but since this lace is fairly stable I didn't need to. This is my second version of the lace - the first I tried using silk organza to bind the seams but didn't like the look or feel so French seamed the lace and then made my own bias binding to finish the neck and armhole seams

Notes to self;
I eased in stay tape to the front top of the bodice but next time I need to be a bit more aggressive with the easing
Either add more boning or interface the underlining - Its not quite stiff enough.
Starch the hell out of the georgette!
Remove all the thread basting - yes it gets hidden but it just looks messy
Iron the rigeline flat first - its bowing the side seams out.

I've just pinned the skirt on here - I want to change the pleats to gathers (I figure it will be more flattering to C's pregnant belly).


I'm hoping to get the skirt finished and insert the zipper this weekend.

Friday, September 25, 2015

Bridesmaid dress sewing

My best friend is getting married in March next year, myself and her sister are the bridesmaids. We'd planned on getting a custom made dress from a website overseas but the good/bad news is her sister has just found out she's pregnant (that's good), which means with a changing shape the chance of the dress fitting properly is not likely as she'll be just over 8mths at the wedding (that's bad, lol).

So, I offered to make the dresses, which I'm actually excited about but have a big learning curve since I've very rarely sewn with lace or chiffon and have never fitted a pregnant belly before.

The current dress plan is a princess line bodice with a lace overlay and sleeves. The skirt will be a chiffon pleated one. I figure I'll make a couple of mock-ups, not only to check the fit but to play with the technique. I've got 2 of Claire Shaeffer's books (Couture sewing and Bridal Couture), so I'll be reading up on sewing with lace. Pattern wise, I have her Vogue 8943 which is different to how I want the dresses made but will give me a good idea on finish and overlay

Here's the inspiration photos, the skirt is like the top photo and then add sleeves like the second photo with the lace overlay only being on the bodice. It will have more of a scooped neckline at the front.


She would like buttons down the back like in this pic, I'm wondering if I make it like a placket that would hide the zipper, still have to play around with that idea though. It may be easier to add a side zipper and have the back non-functioning but geez I hate side zippers! I like the idea that the zipper would be completely hidden and potentially the skirt overlay and back buttons would be not attached to the dress underlay for a couple of inches on either side and then do up and cover the zipper....not sure if its possible of how hard it would be to finish it neatly.


I figure for C (the pregnant bridesmaid), I'll fit her a few weeks beforehand and make her dress with extra wide seam allowances and hem and then fit her properly the weekend before. I'm figuring that fitting a belly would be similar to an FBA? More length and width to fit over the bump?

If anyone has suggestions for books, patterns or blogs to check please let me know!

Sunday, July 27, 2014

Simplicity 1463: Lace back top


Spotlight had a really good sale on patterns this week so I ducked in yesterday and got a few. I've been eyeing this top off for awhile so grabbed it (along with a pile of Vogues and another Simplicity jacket pattern).

It was a very quick sew, I didn't bother with a muslin but did double check the flat pattern measurements and did a 1"FBA that I eased into the side seam.


It has a lot of ease, I should have made a XL or a XXl according to my measurements but this is a SzL with no other fit adjustments other than the FBA. I did change a couple of design things - I did a scoop neck instead of the V-neck and I cut the hem off rounder.


The fabric is a rayon knit from the Alannah Hill outlet in Melbourne and the lace was a remnant out of my scrap drawer.

I'm happy with it, the rayon is drapy enough that the top hangs nicely, I've normally struggle making tops and I think I've just been using the wrong type of knit fabric. I'm not quite sure about the drape at the front of the top, it is designed to be a bit swingy but I have taken a wedge out of the centre front for next time I make it so it sits more like a basic tshirt.


I really like the lace at the back, it does show off my bra straps but I'm bogan enough it doesn't worry me, lol.

Monday, November 28, 2011

Simplicity 2176 Do over


For the office I'll wear it with a shrug


This is the second time I've made this pattern (first time is here). I managed to win a couple of ebay auctions a while ago from a closed down craft shop - I got a full (small) display of mettler threads (drool!), and a big mixed collection of lace, heaps of elastic and some boning. I saw this tutorial on inserting lace and thought I'd use some of the lace I won. After I sewed the top seam though I decided I liked the scalloped edge enough not to bother putting the bottom facing on.


I put the lace around the edge of the bodice too


I really like this pattern- if you use a different fabric for lining (I used a stretch poplin), you can squeeze a dress out of 2 meters. This fabric is a stretch drill I picked up for $3.50 a meter on clearance. Its quite nice to sew, nice and stable but still with some stretch for wearing.


I made a size 20 again, with a 1.5"FBA, added pockets again from S2588.


This is the first time I've made something that lined up with this weeks Sew Weekly challenge, so that's kinda cool. I ended up working extra and doing a big spring clean this week so the dress took a bit longer than normal to be put together, plus on the finishing touches I managed to cut a hole through the back of the dress when I was using the serger to finish the zipper seam......I used a iron on mending patch and its not noticeable but its not the first time I've done this accident, you'd think I would have learned by now!