Wednesday, August 29, 2012

McCalls 5859: Velveteen jacket


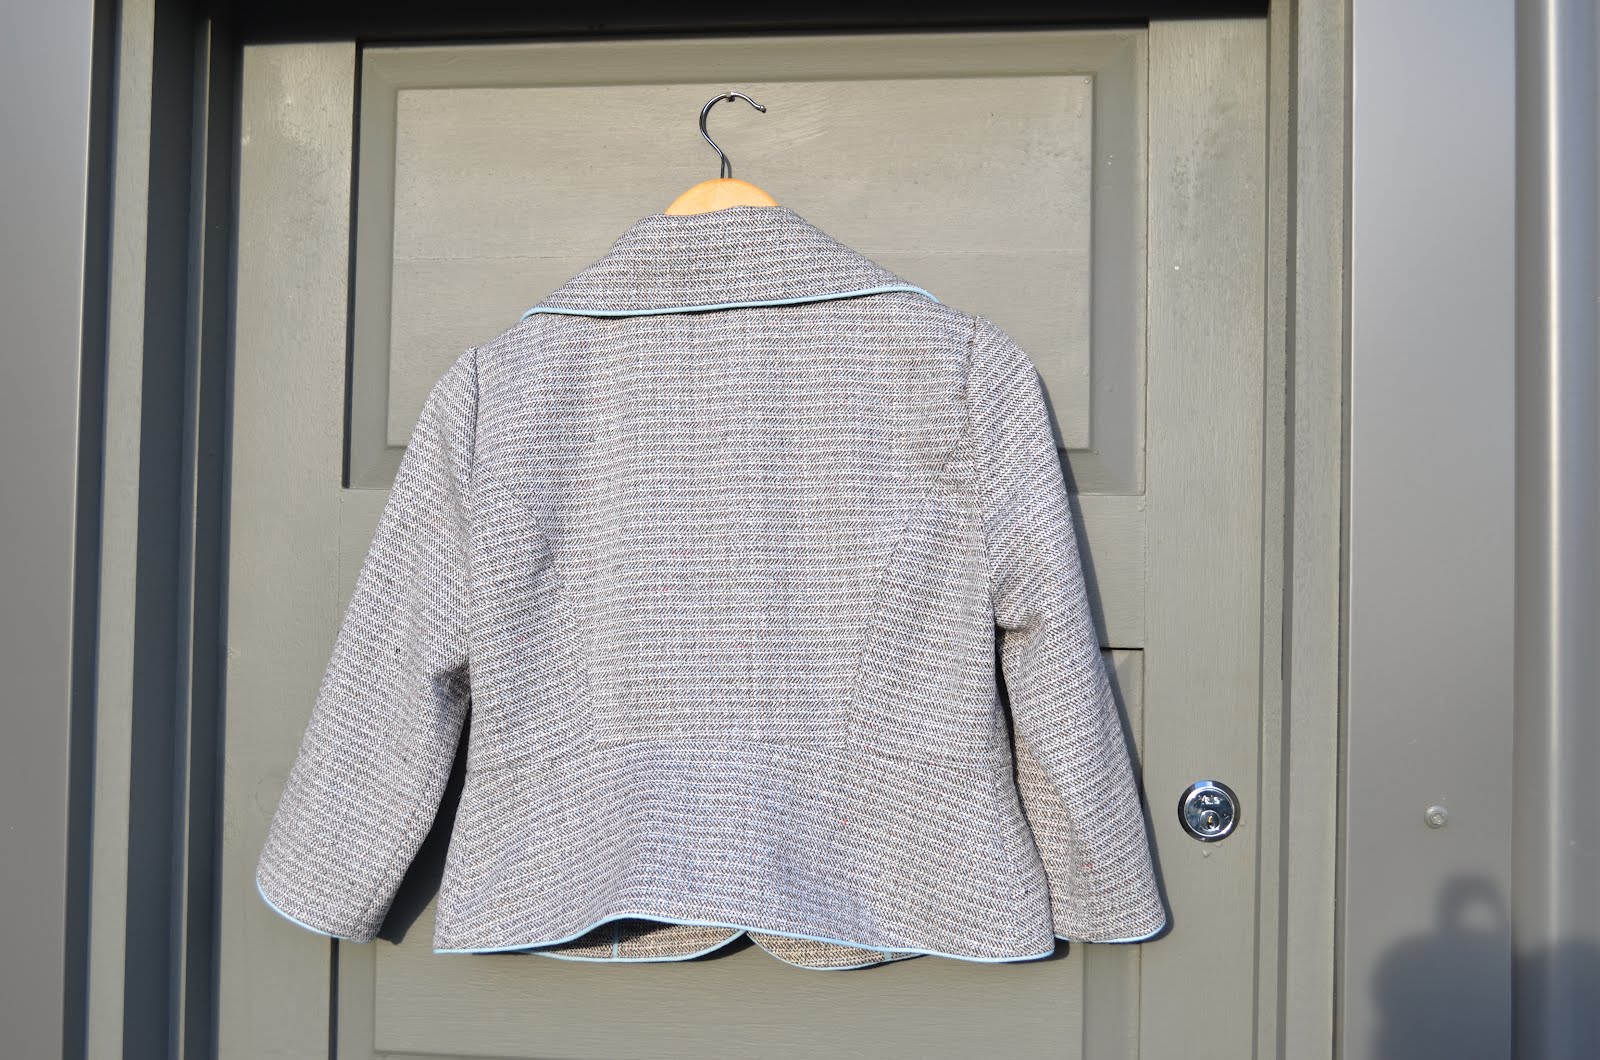
This jacket has a little backstory to it - it started off as a vintage jacket (I'm kind of guessing from the 1960's?) that belonged to an elderly lady my Mum was friends with. Mum saved it from being donated to charity with the thought that I could rework it into something more wearable that she could wear to the lady's grandsons wedding in September.


I've had it sitting in my sewing room for months now because sewing velveteen scares the hell out of me! The last time I used it I managed to scorch, melt and swear at it, lol! So this time I spent a bit of time playing with it, trying out interfacing, ironing and sewing scraps. Surprisingly the fusible interfacing went on fine so I didn't have to bother with interlining or sew in interfacing.


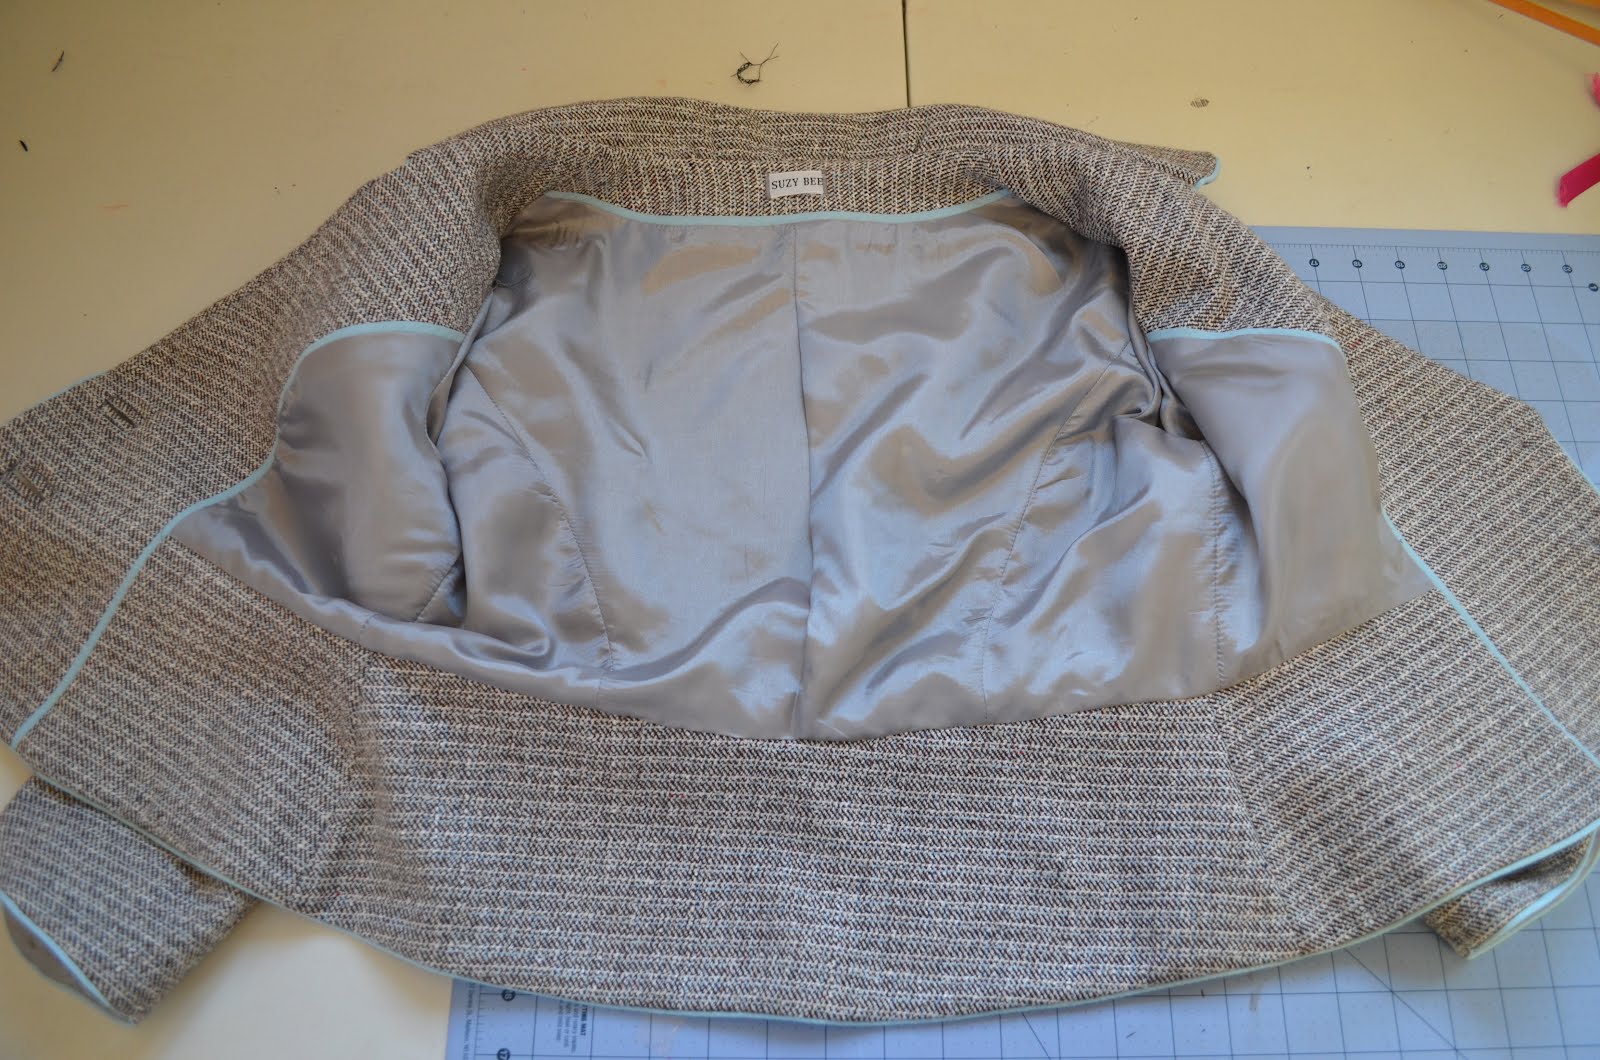
I don't have a needle board so I pressed it from the wrong side using a press cloth and not putting any real pressure on it (on that note, I'm guessing it velveteen? I could be wrong though and it might be velvet? It feels beautiful anyway, lots nicer than a polyester velvet). I didn't have enough to use the velveteen on the facings so I used the original satin lining. It surprised me how much it used, I expected to have a lot of left over material but was only left with tiny scraps!


Its hard to capture the colour properly, its a real deep emerald (my husbands been calling it the leprechaun jacket!)


I had a lesson in humility trying to do bound buttonholes in velvet! They are are a little wonky and uneven but the nap helps hide it a bit!


A little note about the spare buttons - I've been getting frustrated about left over buttons so came up with this idea - a scrap of the material from the jacket with the buttons sewn on and a eyelet in the top. That way it can hang on the clothes hanger and you know straight away which piece of clothing it goes with and you don't have spare buttons hanging around!


This was my Mum's birthday present - Happy birthday Mum :)

Monday, August 27, 2012

Mario Quilt Along: Yoshi


This is a block thats not included in the quilt along but my Son's favourtie character is Yoshi so I wanted to make him one.
Its about half again as big as the other blocks so I'm not quite sure how it will look in the end, I'd like to do this as a centre block and the smaller ones around the outside but will wait until they're all made and lay it out first.

I have been doing some normal sewing as well - I've started working on my pants block with Steph from 3 hours past and I've been working on a velvet jacket for my Mum.

Friday, August 24, 2012

Mario Quilt Along: Goomba and Cloud


Goomba and cloud finished! The grey on the cloud is a bit darker than I'd like but it was the only grey I could find.
I've found if I pin them straight while I iron the seams open it doesn't warp as much as well :)

Wednesday, August 22, 2012

Mario Quilt Sewalong: Mario and Luigi


I am so excited about this quilt! I was a huge Super Mario fan when I was younger (and still play it a bit now) so to see this quilt then find out Cut to Pieces is doing a quilt-along is so cool!

I couldn't find any of the Pellon stick n washaway locally so used a thin interfacing and pieced the blocks like Oh, Fransson! showed with her Postage stamp quilt.

The mario block is a little twisted, I had the iron on too hot and it shrunk and warped the interfacing a bit.....Not sure if I'll redo it or not yet. I found I had to dampen both of the blocks at the end and pin them straight then iron and starch them as they had twisted a bit (I think it was from ironing the seams out flat?).

I've got a bit of catching up to do (the goomba and cloud block) but they go together pretty quickly (I pre-cut all my material) and its kind of feels like doing a jigsaw puzzle to begin with, the ironing is pretty painstaking though!

Tuesday, August 14, 2012

Simplicity 1783: Denim Skirt


I've been dreaming of summer! Its been such a long cold winter down here this year, lots of frosts in the morning and rain. So its nice to sew summery clothes and dream of the beach and warm evening walks with the family!


I actually got this pattern for the pants (though they'd be nice made in bengalene for work), but I really liked the skirt and the top as well! Its meant to be made from a non-stretch fabric but I wanted a basic denim skirt. I graded up to a sz24 but with the stretch I ended up sewing a sz20. I made a tilted waist adjustment (finally figured out that's what I was doing when I raised the back waistband and lowered the front!), added back pockets too just to break the back up a bit.


I love using jeans buttons and rivets and have been ordering the prym brand from the UK to use with the prym pliers (beats a hammer any day!), but the stockist I'd been buying through has closed down. I found mrecht recommended on patternreview, you have to buy in bulk (100 buttons!) and they sell the backing bits separate, but it works out really cheap and I'm pretty impressed with them.


I really like the construction of the vent, I changed mine from being on the front of the skirt to the back and I like how its got a facing on it so it doesnt gape open.


I really like this skirt, I'll be making more for summer :)

Sunday, August 12, 2012

McCalls 6408: Black Tie Cardigan


I needed a palate cleanser after the jacket from hell so revisited this pattern. This time around I added a back seam to help get rid of the excess lower back fabric and added a bit of width to the hips. Its worked really well and fits a lot better than the last version (its shown up quite wrinkled in the photos but looks fine in real life). I did add extra to the hips but next version will have a little more again


Not much else to say but I love this pattern so much! I've worn the grey version heaps lately and the only bad thing I've noticed is the cheap ponte from Lincraft is pilling a lot more than I'd like (I have plans to get some wool blend ponte next time I go to Melbourne!)

Tuesday, August 7, 2012

McCalls 6611 plus a giveaway


I can honestly say I hate this jacket so much I can't even stand to look at it right now!
So the fitting and adjustments - I did a paper fitting - I ended up making a sz20 with a 1.5" FBA, 1" back width and a 1.5" upper arm adjustment. It all went together ok until I realised that the waist was hitting me way too low and that I needed a pretty major narrow shoulder adjustment. Now this is where the hatred comes in - after all the sewing I've been doing this last year or so, I've never had to do a narrow shoulder adjustment and its extremely rare for me to have to change the waist height. I took out nearly 2" in length to get the waist hitting me where it should and I took out nearly 1" for the narrow shoulders.....then I tried to install the sleeves which are a one piece sleeve for starters and have over 2" to ease in even though the pattern drawings show them fitting in smoothly....Grrrrr, I still think the sleeves and armscyes fit so atrociously it makes me angry looking at the damn jacket.


I think if I'd done a proper muslin I could have caught it easier and I would have used a better drafted 2 piece sleeve instead of the standard one piece.
The only thing I do like about it is the fabric which was out of my stash - its some stretch polyester stuff thats like a velour on one side and satiny on the other. I used the velour as the outer and the satin side up for the lining.


I added a hook and eye at the front as well


So does anyone want this pattern? Leave me a comment if you do, I'll pick a random comment if more than one person wants it and I'll post it internationally, just please someone take it!!


**UPDATE**

The winner of the pattern is Sew Busy Lizzy! I've left a message on your blog :)

Sunday, August 5, 2012

McCalls 5859: Wool jacket


I have some beautiful velveteen I want to use for a jacket for my Mum so this is a trial run for fit and checking the pattern.
Its a sz12 with a 2" petite adjustment and a 1/2" narrow shoulder adjustment.
The fabric is a wool blend and I ended up using a cotton batiste for the piping - it was the closest match to the blue fleck through the wool.


The lining is sunsilky lining.


I am not really happy with the piping - I didn't interface the peplum and the wool is drooping slightly over the bottom line of piping, it seems more noticable on the hanger than when its being worn. This is the second time I've tried piping all around a jacket and not been happy with it, I think I'll try using bias binding to edge with next time I get the urge for piping!


I did the flat bias edging on the facings like I did on the herringbone coat. I added the back facing as the pattern doesn't come with one. Bound buttonholes (they really disappear in this fabric).


I think it ended up too short so the next version I'll make the peplum about 2" longer and theres some excess fabric on the sides so I might raise the waist by another 1/2"

Wednesday, August 1, 2012

BurdaStyle Handbook Coat: Red version


I picked up this red wool coating on clearance the other week and thought I'd make my daughter another coat (I never wear red, comes from my last job which had a red t-shirt/jumper as the required uniform and I still hate the colour!)
I sized up on this version, making a 42 graded out to a 44 at the waist. Pinned the bust out a bit and narrowed the shoulders in by 1/2" (I still think it looks a bit wide?) , I cut the sleeve head a bit lower as well to make the gathers smaller.
Self made piping around the seams. I've been having trouble with my piping puckering up on the last couple of coats, seems I was stretching the bias strips too tight when sewing which was causing it. So this time I made sure not to pull when I sewed the cord in and I hand basted it to the coat first. Worked really well, no puckering this time!


Bound buttonholes and single welt pockets. The last version had the standard inseam pockets and she found them really small, too high up and too far back so these work a lot better. Buttons are plastic ones from Spotlight.


Lining is polyester satin


I've had trouble with my coat hems looking floppy and drooping even after interfacing them and ditch stiching so this time I used some fusible hem tape to help hold it up and looking neat. Probably not the most classic of tailoring techniques, lol, but it worked!


I must say I am glad to have this finished - this is actually the second coat I've made her from this material, the other was a wadder, lets just say from now on I am walking my pattern pieces before cutting!