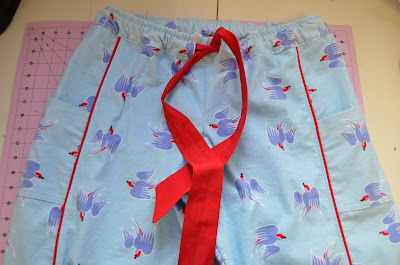
The first thing my daughter requested when I made her these pants were some pockets. These were quite simple to add on and I thought I'd show how I did it;
Firstly, get the side pattern piece
Then work out where you'd like the top of the pocket to fall, we went with 6" from the top of the pattern piece and how deep you'd like the pockets, ours are 8" deep.
Next, put some tracing paper over the pattern and trace the pocket out, adding 1.5cm seam allowance to the bottom and 1" for a fold over to the top. I sloped the top to add some interest but you don't need to do that. Don't forget to add grain lines and notches to the pocket pattern!
Cut out the pockets, turn over and interface the top 1.5-2" for some added stability to the pocket opening.
Then turn under the seam allowances on the top and bottom and press. Top stitch the top of the pocket.
Line up the pocket using the notches and then baste either side of the pocket and top stitch the bottom of the pocket.
Now continue with the pattern instructions and add your piping.
And finish your pants!


What a great idea! These are so kewl!
ReplyDeleteBrilliant idea! Thank you for sharing.
ReplyDeleteI love those pockets. Fab idea.
ReplyDeletebrilliant idea - great pj pants
ReplyDeleteThat's a great idea - so simple and soooo convenient! I hate not having pockets, even in my pj's. Thanks for sharing this!
ReplyDelete