The wedding was about a month ago and I've finally recovered enough to talk about it! This is going to be a photo heavy post - there were too many nice photos of the day just to pick a couple.
This is the final post about bridesmaid dress sewing - part 1, part 2, part 3.
 |
| My boy has grown so much lately, I'm still taller than him in heels though! |
 |
| BTW, its apple juice! |
(Photo credits to: John Davies Photography)
Pattern Details;
Simplicity 4070 for the bodice
Simple gathered skirt
C was 38 weeks pregnant at the wedding, I did the final fitting the weekend before with her and took a couple of tucks out of the lace to get the bodice sitting smooth.
I had a great comment from Sarah on my first post;
"1) empire waist dress 2) yes - you need the pregnancy / beer belly equivalent of FBA to cope with the 8 month bump. Add extra length in an arc from side seam to seam, and extra width to the front skirt. I'd leave hemming and finalising the dress to the week before the wedding."
Adding the extra length in an arc worked an absolute treat and I hemmed the dress on the weekend before as well, just to allow for any extra changes.
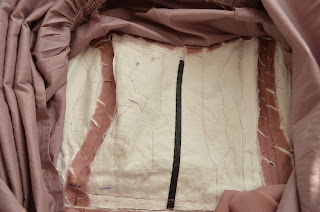
The empire waistband sat nicely above her belly. I do think the inside bodice should have come up higher, thankfully its not too noticeable but just goes to show that even with a fully sewn muslin, the fabric affects the fit so much (I even used a lace overlay on the muslin but it must have been a stiffer lace).
I hand stitched in the lining, its a cotton from Clear-It in Melbourne. Not a perfect match for colour but the closest I could find. I am so glad I went with cotton, it was a pretty hot day (got to 30 degrees Celsius) and we would have melted in a polyester.
Fabric Details;
The lace was a op-shop find in Tailem Bend.
The main fabric is a double gorgette from Spotlight
Lining is cotton from Clear-It
Buttons are plastic ones from Lincraft.
Zipper and bias binding was from Spotlight.
My dress had plastic boning along all seams, but I left it out of C's dress.
I am pretty proud of what I achieved, they are not perfect and I would have loved to use a more luxurious fabric and made a few more muslins but I managed to make them both in time for roughly $100 in materials (not counting time or muslin fabrics) so you have to count that as a win!


Your dresses are beautiful. You did great work. Congratulations!
ReplyDeleteBeautiful pictures! And your dresses turned out amazing--lots of love and work put in to them, and it shows!
ReplyDeleteOutstanding! All of you look so lovely and the dresses fit beautifully, so pretty!
ReplyDeleteJust beautiful - what lovely sewing and detail. And you all look so pretty. Thks for sharing!
ReplyDeleteSo pretty! I just love the color, and it looks great on both of you. ~Martina
ReplyDeleteBeautiful work. You must be so proud of yourself and rightly so.
ReplyDeleteFirst - STUNNING. You did such an excellent job and the dresses are just amazing!
ReplyDeleteSecond - thank you for giving me an idea for my daughter's prom dress. She wanted the back to remain "sheer" and I was panicking over inserting a zipper in the mesh. But I will do partially lined/zipped and either leave a keyhole in back or do buttons as you have here. :)
Oh wow, they turned out so good! Love the colour and the details (those buttons), and I think it's the perfect amount of lace. :) You did a fantastic job!
ReplyDeleteCongrats to your friends - one on getting married and the other on her precious bump there! :)
Your work is beautiful!!!! Everyone looks lovely, and you did a great job on the alterations for the pretty mama to be!
ReplyDeleteSuzy - that's made my day knowing my comment helped you with the dress!! The finished dresses looked great - and fitted a treat - well done! Sarah D
ReplyDeleteWow! It looks nice; especially, it suits for you. I like... ^^
ReplyDeleteYou are stunning; your craftswomanship is superb; and along with yourself, you made the bride and her bridesmaid look spectacular! I can see how such crafting, creating and creations can zap your sewing mojo. Wonderful.
ReplyDelete