Sunday, July 28, 2013

Simplicity 4070: Kitty cat dress


I've been holding onto this fabric since we had the Melbourne social sewing shop back in February. Its from the Alannah Hill outlet and is lovely and soft to touch (I did a burn test and I am guessing its a silk cotton). It is fairly see through so I decided to underline it with a quilting cotton from my stash to give it some body and to stop the seams showing through.

I haven't underlined anything this thin and shifty before. It wasn't as bad as I thought though, I cut it  in a single layer and then machine basted around the pieces. I was worried about the top layer shifting or bagging out but it all seems to be sitting smoothly now its sewn.

 
I did let it hang overnight and then thread basted it around on the hem line before turning under and stitching. Probably overkill but at least it sat nice and smooth when I sewed it.

Adjustment wise, we muslined up the dress first, its a sz 14 with the bust raised by 1", the waistline raised by 1/2" and the side seams taken in by 1/4" with the front bodice seam let out the same amount. The pockets are my favourite ones from Simplicity 2588, I love how they are sewn into the waist seam so they can't flap around.


I'm pretty happy with how it fits her, I'm finally starting to get an idea on what adjustments I need to do which is helping to eliminate the wadders.

Tuesday, July 23, 2013

Using a pants block:

I was asked recently to post up how I use my pants block. I just want to say, this is the way I do it, I'm sure there are different ways and I'm certainly not an expert! If anyone can suggest a smarter or different way to do it, please do!

I've traced my pants blocks onto cardboard, I have one set with darts and one set with no darts. The different seam lines are just for woven and stretch fabrics. When use a stretch fabric I drop the rear crotch and take in the sides. You don't need to put it onto cardboard but I find it easier to see under my pattern.

First step (This is the back of the pants). Mark the stitching lines on the top of the pants piece and the bottom of the waistband then align.


I slide my pants block under at this stage and make sure the grain lines are parallel.

 
I usually line up the crotch line on the pants block and the pattern, this way the inner leg length stays the same length and doesn't need adjusting later.
 
Adjust the pattern pieces to match the pants block (you can see my lines in red texta)


I extend my lines downwards following the same shape as the pattern to add extra width because I usually need it.
 
Same thing with the front - Line up waistband and pants stitching lines.
 
 
Make sure the grainlines are parallel
 
 
 Adjust the crotch and side seams


I usually have to make a fold in the front panel to line up the front and drop the centre front  waistband height.


After I've adjusted the front and back I walk the seamlines to check that it all matches (I used to skip that until I made 2 pairs of pants that fit kind of weirdly and I realised it was because of the seamlines not matching up properly).


This was an easy pattern to adjust, usually I have to drop a lot more in the front and raise the centre back a lot more. If a pattern has pockets I just overlap them and line up the stitching lines like we did with the waistband and top of the pants.

I should mention too that even with adjusting the flat pattern I still cut out the fabric with large outer seam allowances (about 1" extra) as a fitting allowance, once its basted I try it on and adjust to fit. Its always easier to take it in than to try and add width!

I can do more of these posts with different patterns and style of pants  if anyone is interested?

Friday, July 19, 2013

Stripy McCalls 6408


I've had this made for a week or so now but the weather has been so dreadful I haven't been able to take photos. I still only got a couple of pics in between rain downpours so the photos are a bit uninspired!
 
I really like this pattern, I've made it a few times now (including a slight disaster of a zebra print version last month, sounded like such a great idea but was way too overwhelming once made!) Grey version and Black version.
 
It has tons of included ease so this is a sz M with a 1" FBA, 2" upper arm width, 3" off the length, graded out at the hips and an added back seam for shaping.
 

The material is a striped ponte knit from fabric.com which is out of stock now unfortunately, its thinner than I what I would normally call a ponte but has just enough stretch and was lovely to sew.
 

I wear one of these cardigans at least once or twice a week through winter, they are so warm and comfy and so easy to throw on with a pair of jeans in the morning.

Wednesday, July 10, 2013

Burdastyle Handbook: Hooded Coat


This is the third time I've made this for my daughter, its turned into her TNT coat pattern!
This version is similar to the last one, Sz 42 but I took it in at the waist and lengthened the bodice. I also took a 1/2" tuck out of the front bodice piece and pleated the skirt rather than gathering it. The hood is traced off a hoodie she has that fit well.


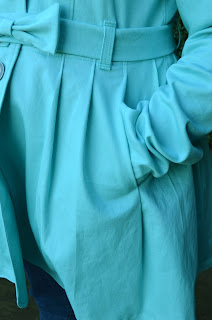
The fabric is a stretch drill from the best garage sale ever, its a mint colour but the photos all came out slightly darker than it is in real life. The lining was a satin she picked out, there was only enough to line the body so the sleeves are a poly lining from Great Nan's stash.


Since the skirt section was pleated I hid the pockets in a pleat, copying the directions from the Colette Macaron dress.


The buttons are reused from the first version of this pattern.


The belt was made mostly following Tilly's tutorial except I used elastic instead of interfacing and some press studs. Makes a really cute belt and I"ll be making more!


I did flat piping around the facings again, I really like how it looks and how little bulk it adds compared to normal piping.


Final word from the daughter;

Wednesday, July 3, 2013

Simplicity 2345 Top and Jeans Contest


So, this is the third time I've made this top and its kind of a fail! I used a rib knit that I got from fabric.com and it's not quite as stretchy as the last material I used plus it has pretty much zero recovery. I cut the hem off once already because it stretched out when sewing and it still looks wavy now. I had to add about 1" to the sides and scoop the armholes out more but it still feels too tight in the armholes, probably because I used bias binding to finish the arms and it just doesn't give as much as the main material.

I have more of this fabric in a grey and I think I'll make a cowl neck Renfrew from it, I think having bands to finish the hems might be the only way to control the waviness.


Jeans Contest

A big motivator to make my last pair of jeans (which I'm wearing here!) was to enter them into the Jeans contest at patternreview.com. I kind of waffled back and forth about entering for the last couple of weeks before finally deciding to go for it on the last day!

So if you are a member please have a look and have a vote, there are some really nice jeans over there!